 DSLR Assistant
All Help articles
Getting Started
Automated Shooting
Reviewing & Organizing
Troubleshooting
Purchases
Take photos from your Mac
Last updated: September 13, 2026
Everything on this page happens on the Camera tab in the left panel. Changes you make there are sent to the camera immediately, and changes you make on the camera body show up in the app just as quickly — use whichever is closer to hand.
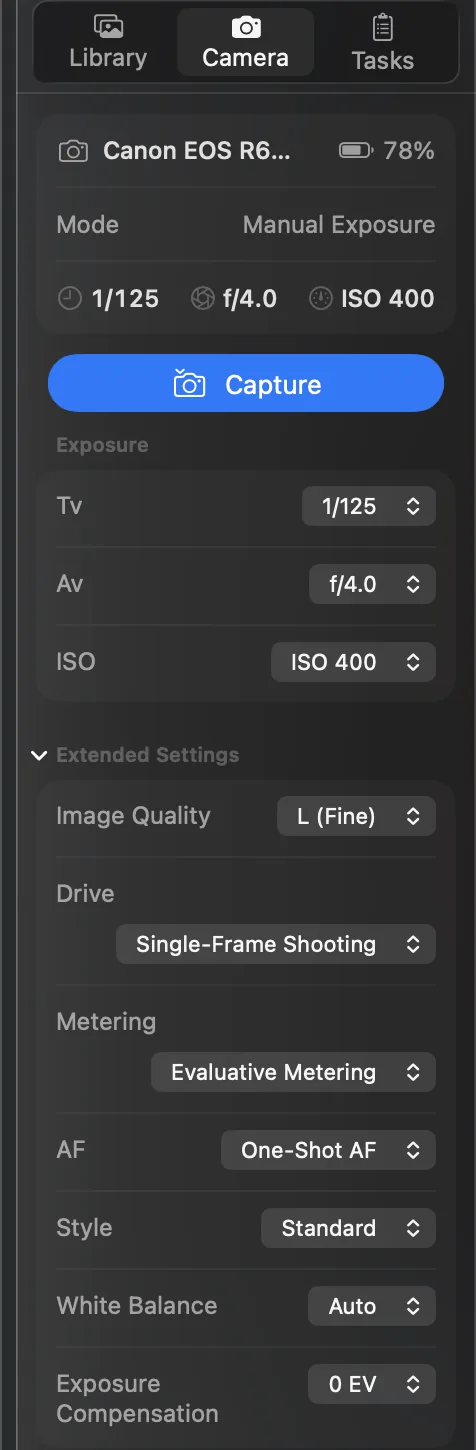
Set the exposure
The Exposure card holds the three settings you'll touch most: Tv (shutter speed), Av (aperture) and ISO. Click a value and pick a new one from the list. The list only contains values the camera accepts in its current mode and with the lens that's attached.
The card at the very top shows the camera's battery level and Mode — the shooting mode (Manual, Aperture Priority, Bulb and so on). The mode is set with the dial on the camera; the app shows it but can't change it.
Release the shutter
Click Capture near the top of the Camera tab, press I, or choose Camera → Capture Image in the menu bar at the top of the screen. The photo is copied to your library and opens in the preview a moment later. Pressing the shutter button on the camera works too — those shots are copied to the Mac the same way.
If Live View is on, the round shutter button in the Live View toolbar does the same thing.
Take a Bulb exposure
For exposures longer than 30 seconds — star trails, light painting, long seascapes — let DSLR Assistant hold the shutter open for exactly as long as you need:
- Put the camera in Bulb mode: turn the mode dial to B. On models without a B position, choose M and set the shutter speed to BULB.
- On the Camera tab, the Tv row turns into Exposure Time. Enter the length in seconds — anything from 1 second to 24 hours (86,400 seconds). For example, 5 minutes is 300.
- Click Start Bulb. A red Capturing indicator shows the planned length while the shutter is open.
- The exposure ends by itself when the time is up. To end it early, click Stop Capture.
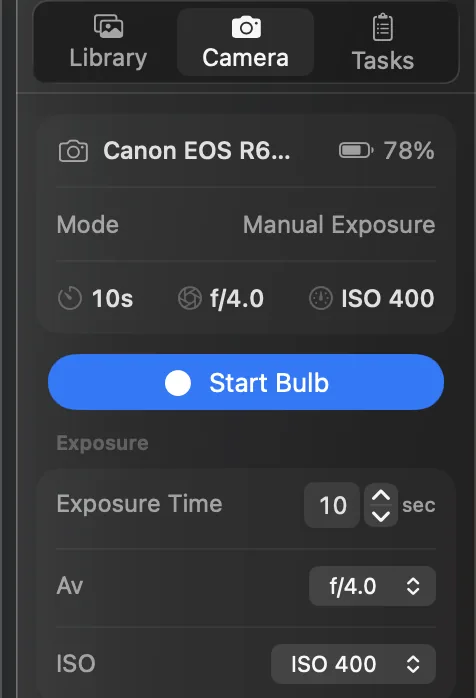
While the shutter is open, the other camera controls are locked so nothing can interrupt the exposure. Your Mac won't go to sleep until it finishes.
To repeat Bulb exposures on a schedule, set the exposure time here and then set up a time-lapse — every shot in the series uses this exposure time.
Still stuck? Contact support →