 DSLR Assistant
All Help articles
Getting Started
Automated Shooting
Reviewing & Organizing
Troubleshooting
Purchases
Where your photos are saved
Last updated: September 13, 2026
Every photo and video you take while the camera is connected is copied to a library folder on your Mac. It's named by your naming pattern and appears in the filmstrip a moment after the shutter fires. Your files stay on your Mac — nothing is uploaded anywhere.
Find the library folder
- Choose DSLR Assistant → Settings… and open the Files & Folders tab.
- The Library Location card shows the current path. Click Reveal in Finder to open the folder.
You can also right-click any folder on the Library tab in the left panel and choose Show in Finder.
Move the library somewhere else
To keep photos on an external drive or in a project folder, click Change… in the Library Location card and pick a folder. New shots go there from then on. Existing files are not moved — copy them over in Finder if you want everything in one place.
Reset switches back to the default folder. It doesn't move or delete anything either.
Choose what's kept on the camera
Open the General tab in Settings. Under Image Downloading, Download to has two options:
- Save to Mac — every shot goes straight to your library; the card in the camera stays free. Good for studio work and long time-lapses.
- Save to camera and Mac — each shot is written to the card and copied to the Mac, so you always have a backup in the camera.
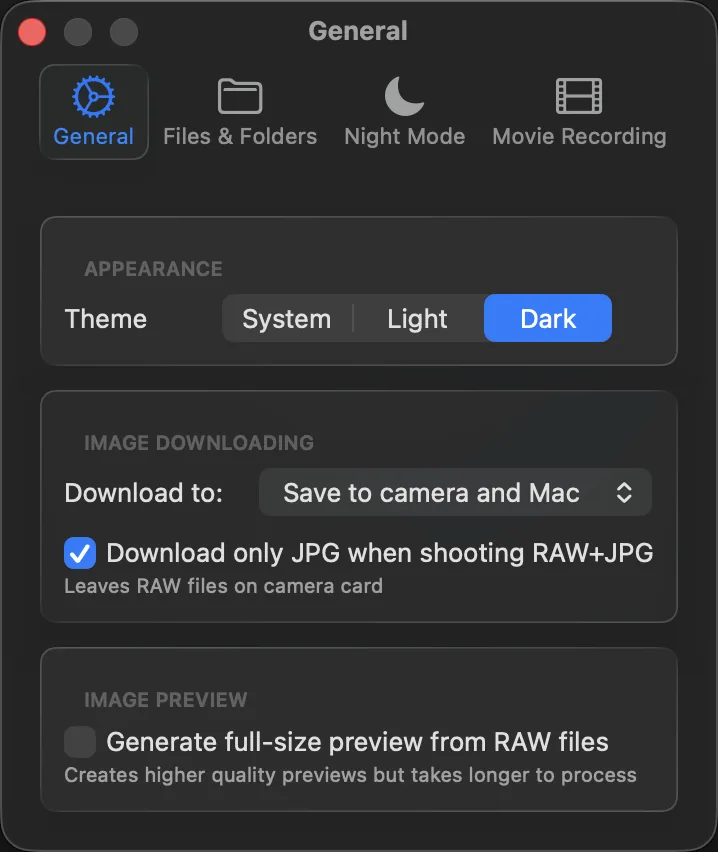
When you shoot RAW+JPG, Save to camera and Mac unlocks one more option: Download only JPG when shooting RAW+JPG. The RAW files stay on the card and only the JPGs are copied — handy when you want quick previews on the Mac and will import the RAWs later.
Sharper previews of RAW files
By default DSLR Assistant shows the preview image the camera embeds in each RAW file, which appears almost instantly. Turn on Generate full-size preview from RAW files in the General tab when you need to judge fine detail — previews then take a little longer to appear. When it's off, a Low Quality badge on the preview reminds you what you're looking at.
Still stuck? Contact support →